This video will show you how to strip a car with the Dustless Blasting system. Some of these tips will apply to wet or dry blasting.
Before the Job
During the quoting process it’s important to understand all of the customer’s needs. Here are a few examples:
- What finish does the customer want to achieve? Learn about the different surface preparation standards here.
- Will you be doing all the prep work and masking, or will he do it before you arrive?
- If you reveal Bondo that isn’t currently visible, does he want you to remove it, or leave it intact?
- Will you be handling the cleanup?
- Make sure the customer has arrangements to prime the car within 72 hours to prevent rust.
- Caution him on recontamination, which can cause surface rust.
- This may also be a good time to take thorough photos of the car before you start working on it, especially showing any pre-existing damage.
Vehicle Prep
Before blasting your car, you’ll want to mask off all rubber, chrome, plastic, glass, and electrical wires, as any form of abrasive blasting may damage them. What can’t be completely removed should be covered.
Many of our contractors like Gorilla tape for masking. However, it can leave behind a sticky adhesive mess that will be a hassle to remove. To avoid this, use masking tape or painter’s tape underneath, only overlapping by a quarter inch or so. You’ll get a strong bond that stands up to abrasive blasting, but is still easy to remove.
Note that glass can be etched just by ricochet, especially when dry blasting, so it’s important to cover all the glass, not just the edges. Cardboard is a good way to do it.
Read more containment and cleanup tips here.
Set Up Your Blast Area
Removed coatings aren’t always safe for the environment. To contain and dispose of waste properly, cover your blast area in plastic so you can roll it up and throw it away after the job.
If wind or momentum is going to carry your abrasive into sensitive areas, a simple curtain is usually enough to block it, so that it falls to the ground.
Preventing Rust
We cover filling your Dustless Blaster in other videos, but I want to remind you to add the appropriate amount of rust inhibitor to your blast water before adding abrasive. It must be included in the blast water and in the final rinse water to be fully effective.
Safety
Of course while blasting you need to wear proper protective equipment, at least a face shield, gloves and hearing protection. We also recommend the air conditioned Nova 3 Comfort System.
General Blasting Technique
When blasting, it’s more efficient to hit the surface at an angle rather than straight on, that way you’re sort of peeling paint off, rather than just pounding it in. A 30 to 40 degree angle is good.
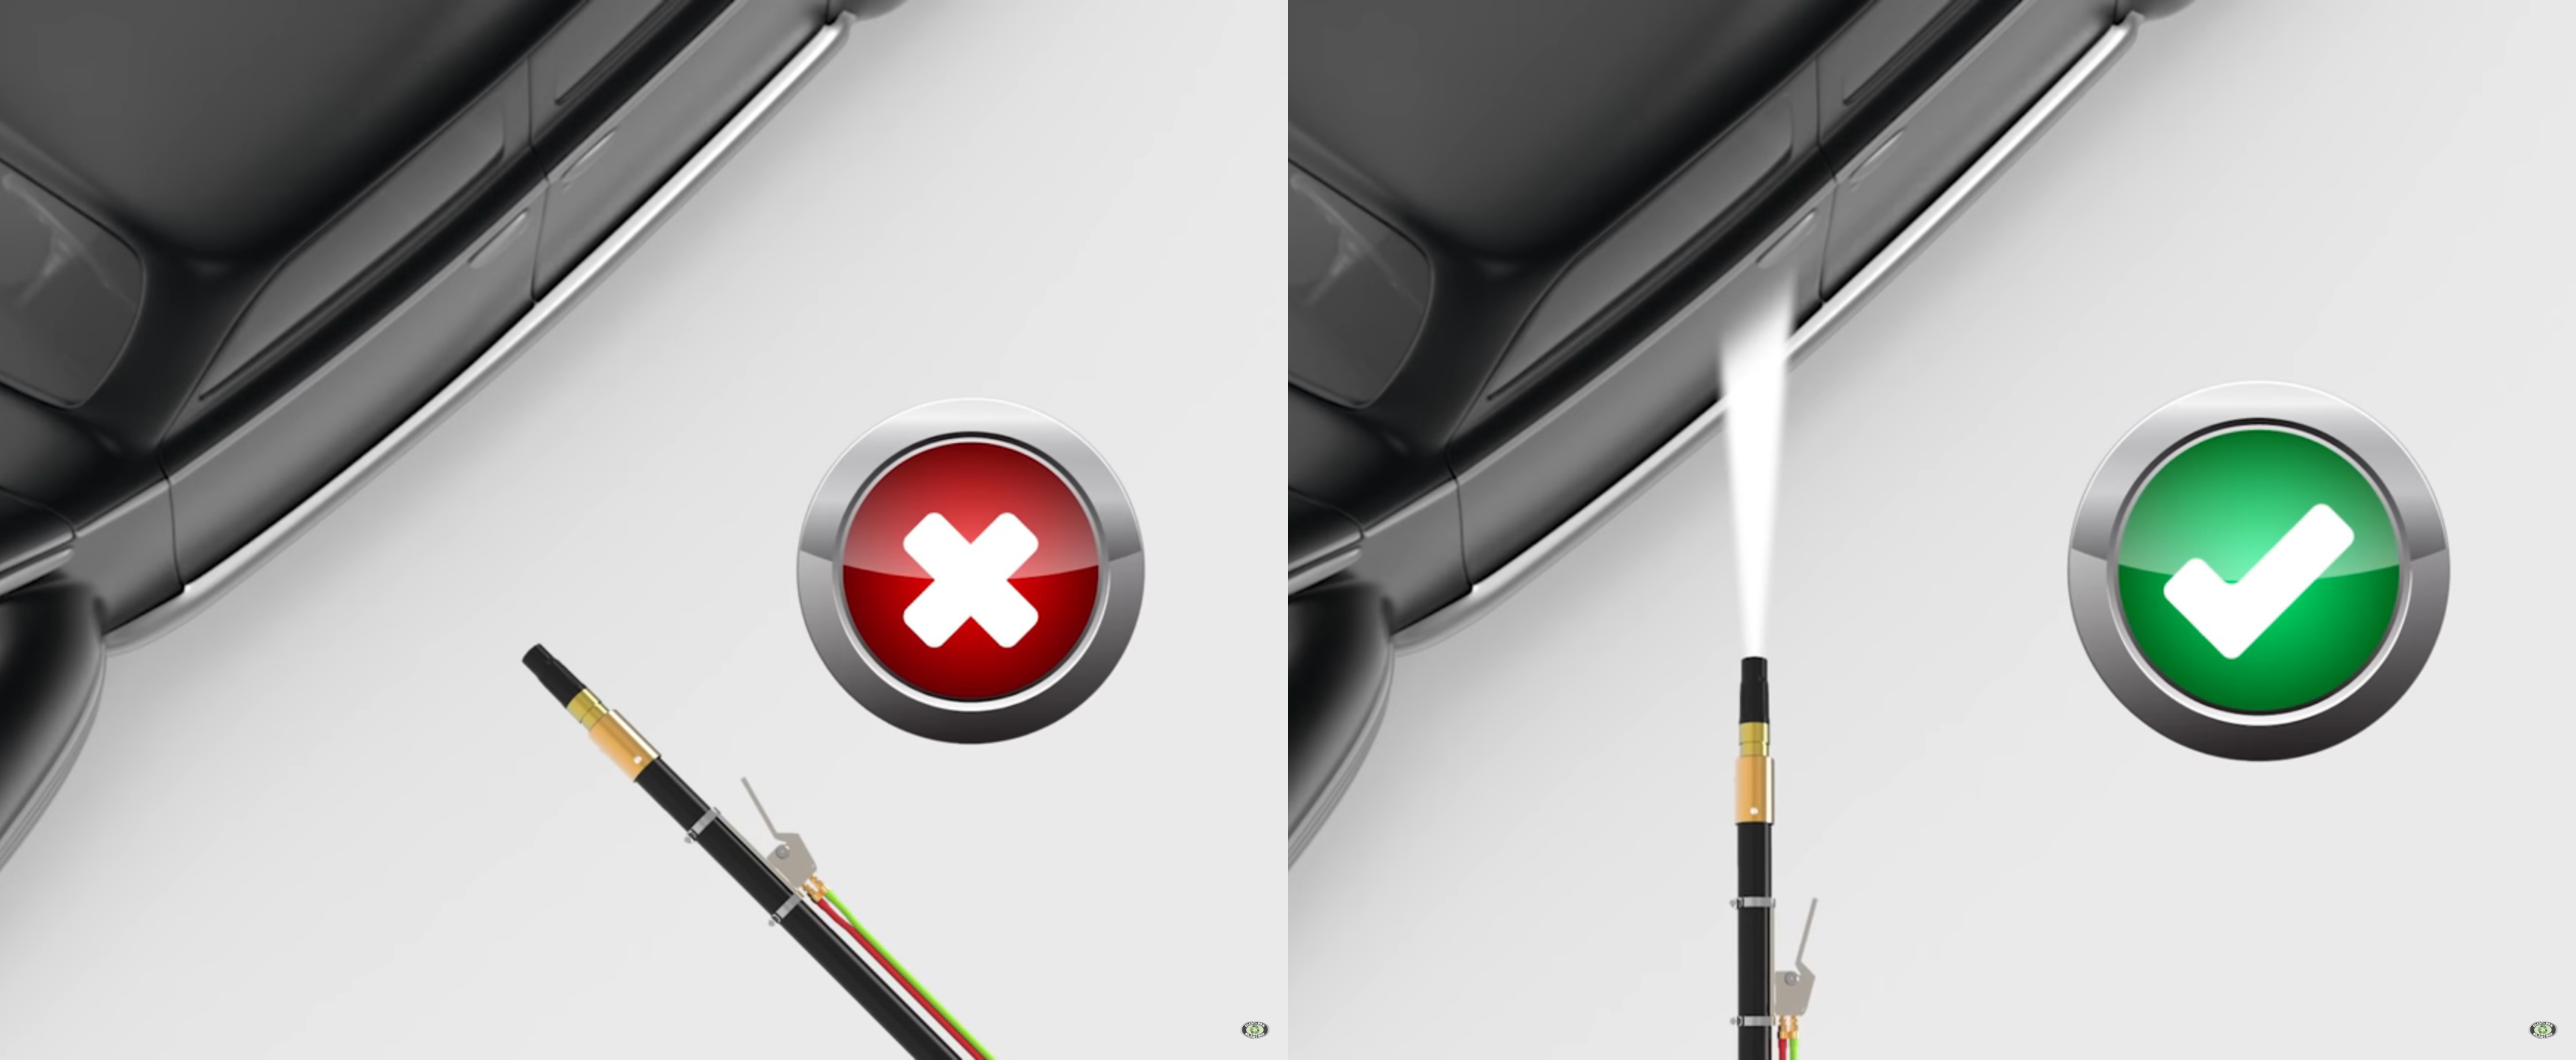
You also want to strike a balance between removal speed and standoff distance. When close to the surface, you’ll see faster removal, but from a smaller area.
Backing off increases the blast pattern size, and allows you to move at a more comfortable pace, while more evenly distributing the pressure and friction on your panels.
Holding the nozzle 3 inches away and moving frantically to keep up will lead to unnecessary fatigue.
Protecting Thin Panels
The water in the Dustless Blasting process reduces the temperature of the blast surface, which eliminates heat related warping. However, metal can still bend under too much pressure, or stretch when friction is applied too heavily to a small area.
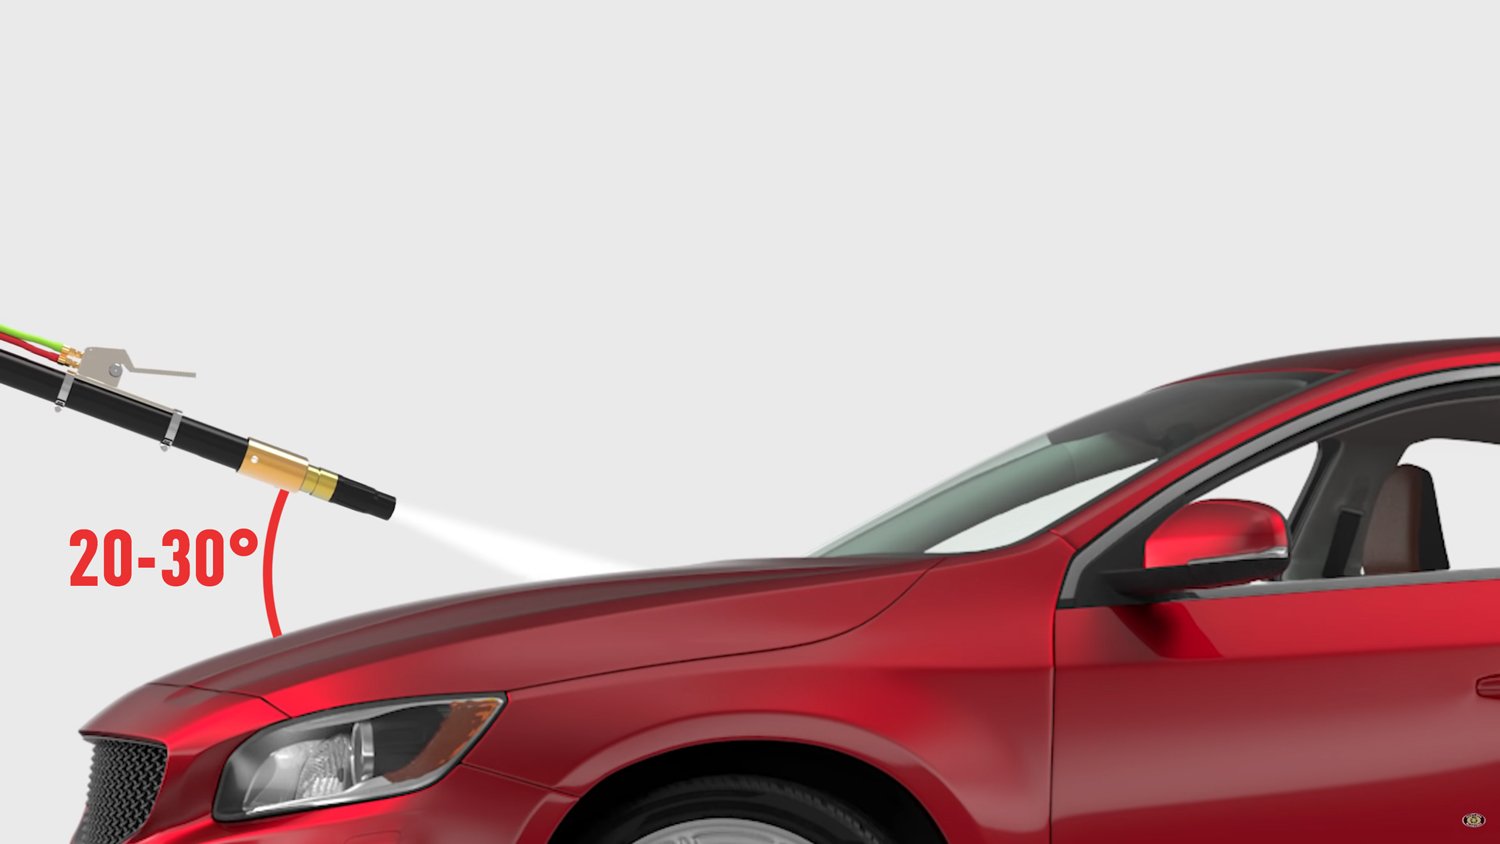
If you’re blasting thin or large panels like hoods or trunk lids, you’ll want to blast from farther away than you normally would, spreading out the blast pattern more.
At a 20-30 degree angle, use a sweeping motion, being careful not to linger in any one area for too long. This technique will make the removal slower, and may require multiple sweeps, but it will distribute the pressure and friction more evenly, keeping the integrity of those panels.
If you have to blast the underside of a hood or trunk, be careful not to blast through the adhesive that anchors the frame to the skin.
Rinsing / Cleanup
The final step is to rinse the car down with Dustless Blasting rust inhibitor. It cleans the metal, removing chlorides and other contaminants, and once it evaporates you’ll be left with a perfect paint ready surface.
The easiest way is to add the Rust Inhibitor to your water tank and use the high volume water pump to rinse the car down. You can also use a fertilizer proportioner, or a pressure washer.
After the rinse, remove any pooled liquid still on the car so it can dry quickly. A leaf blower is the best way.
The rust inhibitor should be able to prevent rust for up to 72 hours, as long as the metal is not recontaminated. Recontamination could come from any sort of moisture, like morning dew, or even body oils from touching it, so wear gloves when moving it.
Disposal
Finally, the easiest way to collect and dispose of the spent media is to cut your plastic into sections, and roll it up into manageable bits. If you can let the media dry out in the sun for a while first this process will be much easier.